CarPC – Corsa D – Part 1: Introduction

From April 2015, since I own this car, I wanted to have a better in-car-entertainment (ICE) system. My Opel Corsa D from 2009 started life as one of the most-basic models, called Essentia in Europe or Life in UK. From factory it comes with basic plastic steering wheel with no radio controls, BID screen, CD30 (no MP3) and only 4 front speakers in front. This is actual photo of my Corsa D, with leather steering wheel with radio controls I installed week ago. I love it. Everything else on this photo is stock.

IMG_3774_web

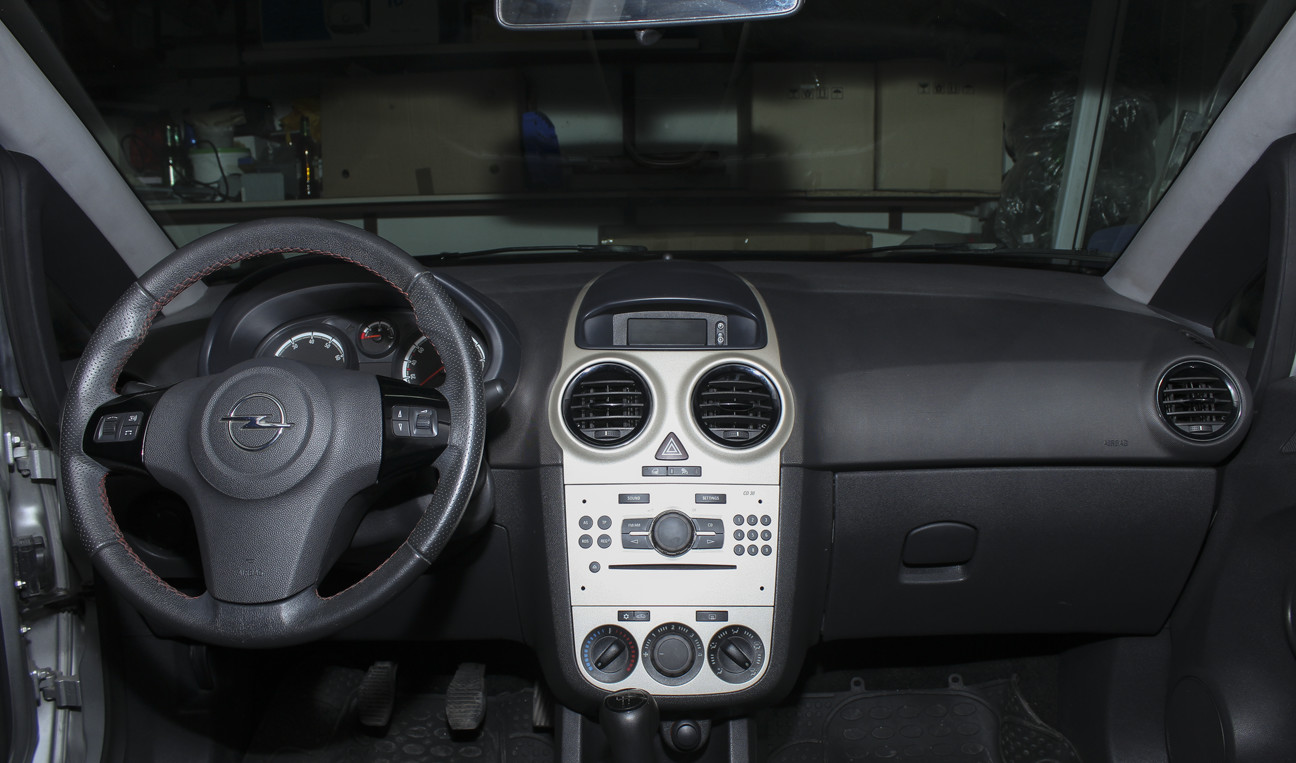
There is no centre speaker and no rear speakers. First thing was modifying my CD30 (Delphi-Grundig) amp and add an AUX input cable. I couldn’t find the schematic on the internet, so I figured out I could insert analog audio signal directly in the power-amp. And yeah, it worked. With a good source (like high quality smartphone), it’s sounds great.
But, I needed something better. And I found the answer – CarPC (Carputer, Car Computer – whatever).

I decided to build a real CarPC, not just sticking a tablet on my windshield and call it done. For this project I will use Raspberry Pi 2 Model B as the main unit, the CarPC.

IMG_3814_web
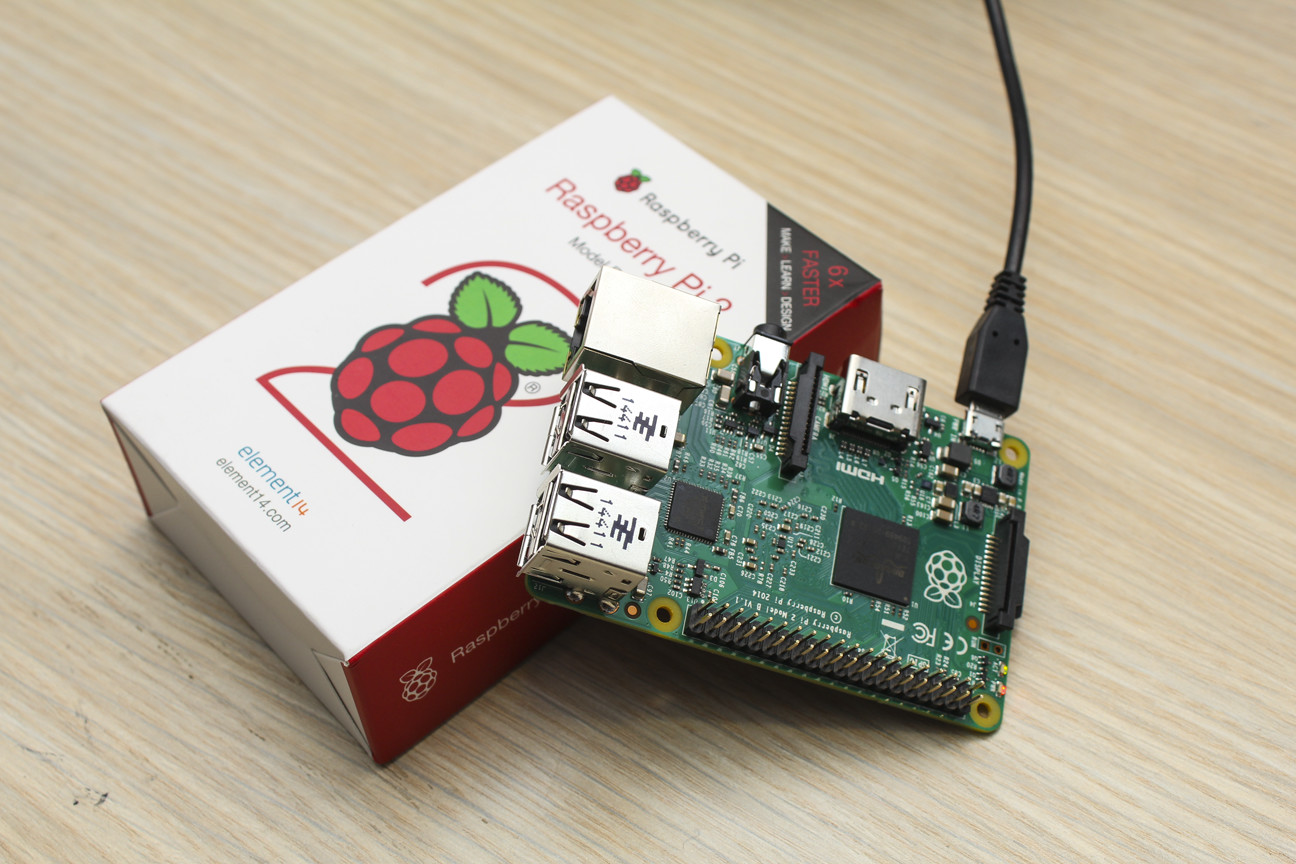
It has 900MHz quad-core CPU, 1GB RAM, 4 USB Ports, LAN port, HDMI out, Audio out, microSD slot and 40 GPIO ports. I want the ability to add modules like WiFi, GPS, to connect the original steering wheel controls via CANbus system on the RPi and so on. I also like the idea of running full-size Linux customized the way I like it. It could also run XMBC (Kodi) very smooth.

Display:

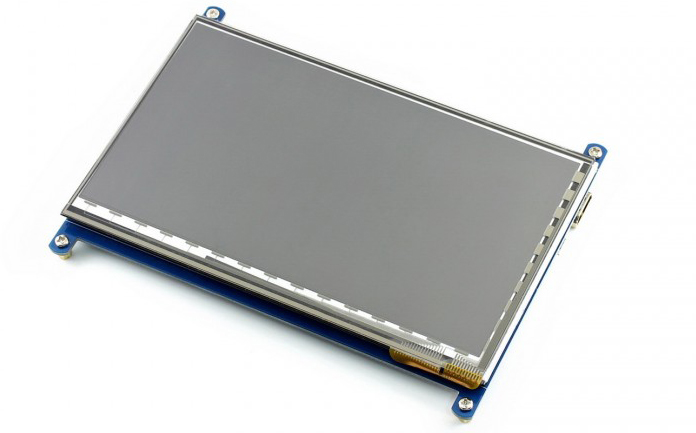
I want to have high-resolution display build in the dashboard with capacitive touchscreen. I found one on eBay that fits my needs and it has 1024×600 native resolution instead 800×480 as most 7 inch displays on the market.

7inch-hdmi-lcd-c-1

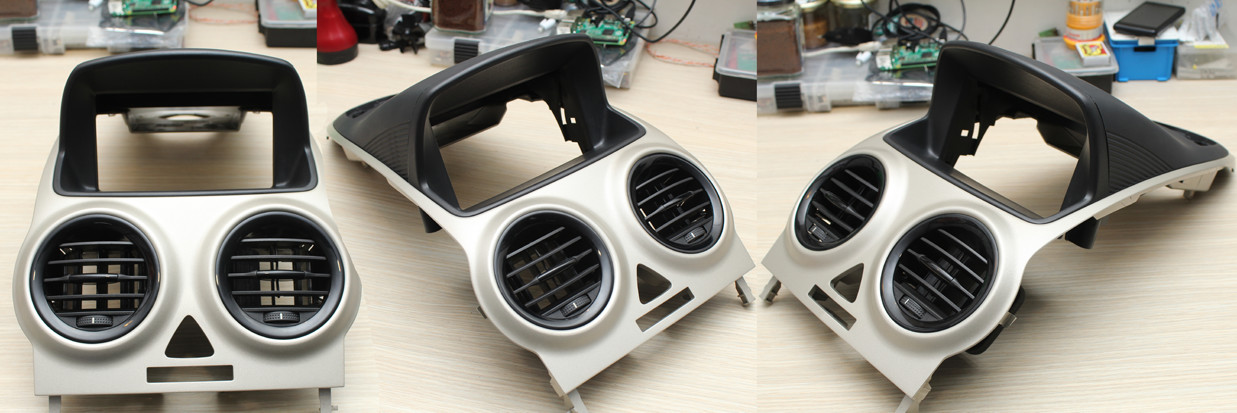
I will mount the display inside the original bezel found on Corsa D with bigger, colour screen called CID (colour-info-display).  I ordered them from the official GM dealer in my town.

IMG_3805_web

I still have to wait for the screen to arrive. Before that happens, I want to build RPi power supply, install software, program some CD30 buttons to work on the RPi and so on.

Just a little teaser with my tablet! 🙂

IMG_3849_web

Continue to Part 2: Interfacing radio buttons >>>

9 thoughts on “CarPC – Corsa D – Part 1: Introduction

  1. Martin

    Hi

    I am looking to do a similar build on my corsa. What tablet do you have that fits in your teaser pic?

    Thank you in advance

    Martin

    Reply
    1. Dimitar Post author

      Hello, thank you for your question!

      The tablet on the teaser pic was a generic chinese 7″ inch screen tablet with touchscreen removed so that it could fit. Every tablet I have seen has that black frame and with it you just can’t fit it in the original screen mount. Even 7″ inch is bigger than the opening, original CID is around 6.5″.
      I didn’t want to cut any plastic, so I solved that screensize problem in the software, reducing the overall resolution and configuring overscan on the Raspberry Pi.

      Let me apologize for the delayed answer – the server migration went very slow.

      Reply
      1. Rinse Ringma

        So your 7 inch display for the Pi did not fit also? I’m looking for a solution just like that, but im trying to get a display with hdmi to fit inside the bezel. It’s going to mirror a android tablet with a display link adapter. So i think overscan is a no go on android.

        Reply
  2. Olivier

    Hi,

    Great job!!!!
    I have a touch and connect and large screen display (but not in colour), who give me airconditionner informations, consumption, etc. Do you think this 7″ screen (with raspberry) can replace the original screen?
    To some extant, i want to have a double display, one for original informations and the other for raspberry! :-/

    Reply
    1. Dimitar Post author

      You can fit 7″ inch screen inside, but you have to cut some plastics and adjust overscan so the screen will mimic the 6.5″ size of the original display you have. You can mount your original Touch and Connect screen on another location, like the interior roof light. I saw this done on an Astra H. I will soon post an update, I’m waiting for RPi 3 to arrive and complete the project. 🙂

      Reply
  3. Olivier

    I have a touch and connect and an other screen (in the top of the board) who don’t operate with the touch and connect. It’s this other display, i would replace by the 7″ screen with RPi3. So you can’t recape informations of the other display (air conditionner, consumption) of the 7″ screen of raspberry pi!?

    Reply
    1. Dimitar Post author

      If you have decent knowledge in electronics and programming, ofcourse, it can be done.
      You can sniff the GMLAN/MSLAN/HSCAN CANBUS networks with appropriate hardware and software for messages that are sent to the original display, decode those messages and make a program inside the RPi to read them and display the information.

      Reply

Leave a Reply

Your email address will not be published. Required fields are marked *